Today I have a project to show you that has a first attempt for me on it again – the foiled background. I received a laminator as a gift some months back and so I have, as time allows, been trying various designs. Since I don’t have a laser printer, I am using the local copy shop to get the laser prints I need. This one the machine’s toner seemed to not spread very evenly, but I opted to try it anyway and I really liked the almost distressed look that came out the back of the laminator.
 CAF Morning Glory |
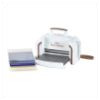 Platinum 6 |
 Craft Tweezers |
 Aleene’s Tacky Glue |
 Blessings Stamp & Cut |
 Gold Foil |
 Scor-Tape 1/8 |
 Wink of Stella |
 Nuvo Crystal Glaze |
 E6000 Spray |
*Links in the supplies list are affiliate links. I get a small percentage of the price of the product if you would choose to buy it through my link, at no cost to you. I only use affiliate links for products that I have purchased with my own money and enjoy using.
In line with new European Data Protection Laws (GDPR) by commenting you know that your name and comment are visible to all who visit this blog and thereby consent to the use of your personal information for this specific purpose.
Many thanks for visiting and commenting on my blog!


Gosh, Monica, that turned out amazing! I Pinned this because I, too, have all the supplies and have only foiled once, using the Deco Art Transfer Gel and was shocked it worked. I received a Scotch T901 laminator for 2019 Xmas and have yet to use it. I'm skeered! haha I have Altenews Painted Flowers stamps+dies where you layer the ink and haven't used them yet. Skeered! So, maybe you can inspire me? Yours came out so good. I keep reading horror stories where it just doesn't stick and the laminator's not hot enough. I am thinking, iron? haha Great job! xoxo
Awesome design here and fantastic colours and foiling.
I love a morning glory. Especially blue ones. Very pretty. [Bunny]
Beautiful card and foiled background love the die-cut flowers
Carol x
It looks really fabulous, Monica, and so much dimension with your contrast of sparkle and matte! Lovely! hugs, de
Monica your card is just fabulous. I haven't seen the laminators used for foil before and you sure made a gorgeous card with it. I'll have to check this out, very pretty, hugs, Lori m
Sometimes there are happy accidents in "mistakes" and I think this card proves that, Monica. It's beautiful !!
Haha, Amy – I iron my art work all the time! xx
A gorgeous card, Monica! The foiling turned out lovely and the die flowers are simply beautiful. xx
The effect from the laminator may not have been intended, but it's amazing. If we tried to create exactly this gilding, it would not be possible. Sometimes chance creates amazing things. I love your project. These clematis flowers look beautiful against this background
xx